

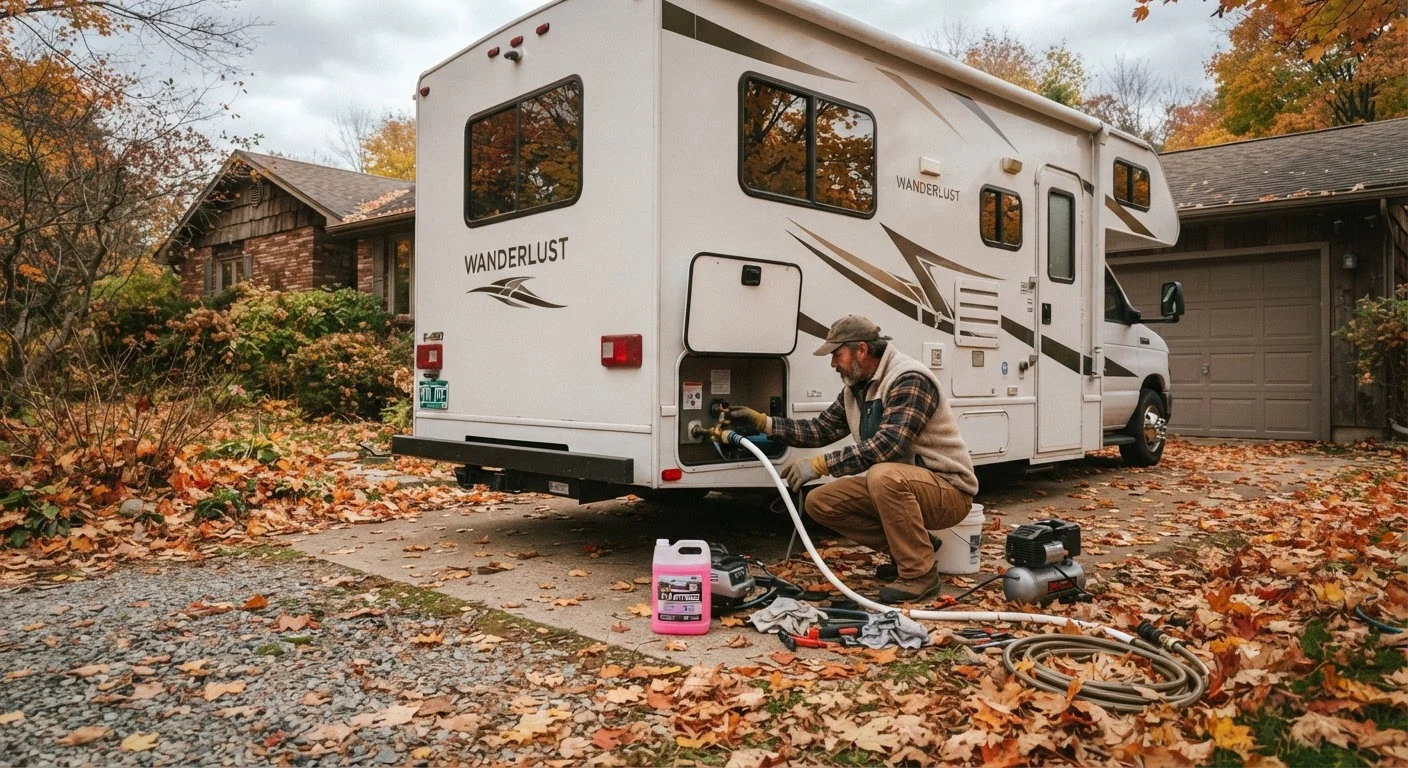
Why Winterization Is Non-Negotiable
Water expands when it freezes — a basic fact of physics that becomes an expensive problem if any moisture remains in your RV's plumbing when temperatures dip below 32°F (0°C). A cracked water pump, split pipe fitting, or burst holding tank can cost anywhere from a few hundred to several thousand dollars to repair. Winterization eliminates that risk by ensuring no water is left anywhere in the system.
Unlike winterizing a home, RV winterization must account for a compact, interconnected water system — fresh tank, water pump, hot water heater, gray and black tanks, and all the lines connecting them — plus an exterior that's exposed to wind, UV damage, and moisture intrusion year-round. Seals degrade, and a winter of freeze-thaw cycles accelerates that deterioration significantly. For background on how overlooked seal problems develop, see our guide on common RV roof and seal problems.
Plan to complete the full winterization process before nighttime temperatures in your storage area consistently reach freezing — not after.
What you will need
What You'll Need Before You Start
Gather all materials and tools before beginning so you're not stopping mid-process with an open water system. Having everything staged saves time and reduces the risk of missing a step.
Non-toxic RV antifreeze (pink)
Flushes through water lines to displace any remaining water without harming potable water components.
Air compressor with RV blow-out plug
Used as an alternative (or complement) to antifreeze for forcing water out of lines with compressed air.
Water heater bypass kit
Redirects antifreeze flow around the water heater so you don't waste antifreeze filling the tank.
Holding tank treatment or flush wand
Cleans and deodorizes black and gray tanks before long-term storage.
Lap sealant and UV-resistant RV roof sealant
Reseals cracks or separations in roof seams, window frames, and slide-out edges.
Tire covers (UV-resistant)
Shields tires from UV degradation and ozone cracking during outdoor storage.
Desiccant moisture absorbers
Reduces interior humidity to prevent mold, mildew, and musty odors during storage.
Battery trickle charger or maintenance charger
Maintains house battery charge over the storage period to prevent sulfation and capacity loss.
Step-by-Step Winterization Process
Follow these steps in order. Skipping ahead — particularly through the water heater bypass — is one of the most common and costly mistakes RV owners make during their first winterization attempt.
Drain and flush the fresh water tank
Open the drain valve on your fresh water tank and allow it to empty completely. Once drained, add a small amount of clean water, slosh it around, and drain again to remove any sediment or residue. Close the drain valve securely when finished.
Bypass the water heater
Before introducing antifreeze, install or engage the water heater bypass valves. Most modern RVs have a built-in bypass; older units may require an aftermarket bypass kit. This step is critical: without bypassing, you'll waste 6–10 gallons of antifreeze filling the water heater tank unnecessarily.
Drain the water heater
With the bypass engaged, open the water heater's pressure relief valve briefly to break any vacuum, then remove the drain plug (or open the drain valve) and allow the tank to empty fully. Replace the drain plug before moving to the next step.
Blow out water lines with compressed air (optional but recommended)
Attach the blow-out plug to your city water inlet. Set your air compressor to no more than 30–50 PSI — higher pressure can damage fittings. Open each faucet one at a time (hot and cold separately), starting with the farthest from the inlet, until air flows freely with no spitting water. Run the toilet flush valve and exterior shower if equipped.
Pump non-toxic RV antifreeze through all lines
Connect a siphon hose from the water pump intake to your antifreeze container. Turn on the water pump, then open each faucet — starting at the farthest point — until pink antifreeze flows steadily. Cover: kitchen sink (hot and cold), bathroom sink (hot and cold), shower, exterior shower, and toilet. Flush the toilet until antifreeze appears in the bowl. Pour a small amount of antifreeze directly into each drain to protect the P-traps.
Flush, treat, and close holding tanks
Dump both gray and black tanks at a proper dump station. Use a tank-flushing wand or built-in flush system to thoroughly rinse the black tank. Once emptied and rinsed, add a small amount of RV antifreeze (typically 1–2 quarts) to each tank to protect the tank valves and seals from freezing. Leave the tank valves in the closed position for storage.
Inspect and reseal exterior seams and roof
Walk the entire exterior perimeter and inspect all caulked or sealed joints: roof vents, skylights, air conditioner base, slide-out seals, window frames, and entry door frames. Press gently on any sealant that looks dull, cracked, or pulling away. Clean the area with an appropriate solvent, then apply compatible lap sealant. Allow adequate cure time per the sealant manufacturer's instructions before covering the RV.
Timing Is Everything
A single overnight freeze before you've completed winterization can crack pipes, split tank fittings, or damage the water pump. Monitor your local forecast and schedule winterization well before temperatures are expected to fall below freezing — not the night before a cold snap. If you're caught off guard, contact an RV service center; many offer mobile winterization services.
Seals, Exterior, and Long-Term Storage Tips
Once the plumbing is protected, shift your attention to the RV's exterior. Rubber seals around slide-outs, windows, entry doors, and roof vents are especially vulnerable to cold-weather cracking. Inspect every seam and joint; if you see any cracking, separation, or discoloration, clean the area with a dedicated RV roof cleaner and apply appropriate lap sealant before temperatures drop. The same principle applies to storing any vehicle long-term — seals and rubber components suffer the most neglect.
For tire preservation, inflate tires to the recommended pressure (found on the tire sidewall or in your owner's manual) and place UV-resistant tire covers on each wheel. If possible, park on boards or tire pads to reduce ground moisture contact. Consider placing desiccant moisture absorbers inside the cabin to prevent mold and mildew buildup over the storage period.
Disconnect and remove the house battery (or connect it to a trickle charger rated for RV batteries), cover roof vents with insulated vent covers, and close all window and door awnings if applicable. Leave interior cabinet doors open to allow airflow. Before your next season begins, use our pre-departure checklist to de-winterize safely and systematically.
Label Everything Before You Store
After completing winterization, place a note or tag near the city water inlet and on the water pump switch indicating the unit has been winterized with antifreeze. This simple step prevents accidental use of the water system during storage and serves as a helpful reminder when de-winterizing in spring.
The content on this site is for informational purposes only and is not a substitute for professional advice. Always consult a qualified professional for guidance specific to your situation.