

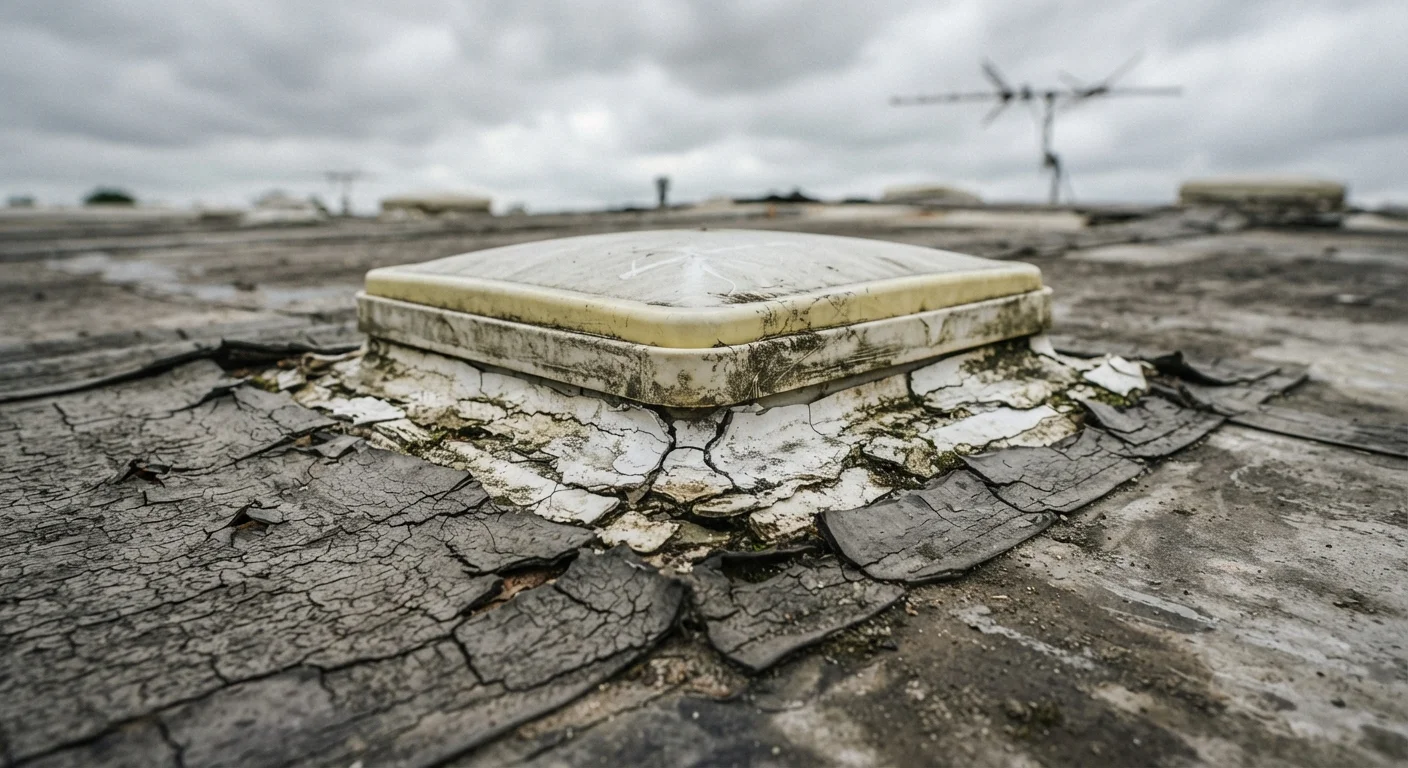
Why RV Roof Leaks Are So Hard to Catch Early
An RV roof endures conditions that would challenge any residential structure—UV radiation, thermal cycling, highway vibration, tree branches, and pooling rainwater—all compressed into a lightweight assembly that must also stay road-legal. The result is a surface that degrades quietly. By the time a water stain appears on your ceiling fabric or a wall panel feels spongy underfoot, moisture has often been migrating through insulation and wood framing for weeks or months.
Unlike a house roof, where damage tends to be visible from the ground, an RV roof demands hands-on inspection. Many owners never climb up there, partly because access feels awkward and partly because the roof looks fine from a distance. That assumption is where expensive repairs typically begin.
If you're newer to RV ownership, our guide for first-time RV owners covers the broader preparation checklist you'll want before your first trip—roof inspection included.
Skipping annual sealant inspection because the roof looks intact from the ground.
Why it happens: RV roofs are out of sight and out of mind. Owners assume visible deterioration would be obvious without climbing up, but cracks in lap sealant around vents or AC units are rarely visible from below.
Using the wrong type of sealant for the roof material.
Why it happens: Hardware stores sell general-purpose caulks that seem adequate for the job. Owners unfamiliar with EPDM, TPO, or fiberglass roof chemistry apply products that aren't chemically compatible, leading to premature failure.
Ignoring small bubbles or blisters in the roof membrane.
Why it happens: Bubbles in an EPDM membrane look cosmetically minor and don't immediately suggest a leak. Owners often defer repairs, not realizing that the adhesive bond underneath has failed and water can now travel laterally beneath the membrane.
Overlooking the seams where the roof meets walls, slide-out toppers, and entry door frames.
Why it happens: Most attention goes to the flat roof surface and roof-mounted equipment. The perimeter seams and transition points—especially around slide-outs—flex constantly with road travel and are frequently the actual entry point for water.
Waiting for interior symptoms before investigating a potential leak.
Why it happens: A ceiling stain or soft floor feels like the right trigger to act. But interior evidence typically means water has already saturated insulation and framing materials, compressing the repair timeline and cost significantly.
The True Cost of Ignored Roof Maintenance
Water damage in an RV compounds quickly because most modern coaches use wood-framed sidewalls and floors covered with a thin membrane. Once moisture saturates that framing, delamination—where the structural layers separate—begins. Delaminated sidewalls and floors can require panel replacement that runs into thousands of dollars, and in severe cases the damage may be deemed a total loss by an insurer.
~75%
RV insurance claims involving water damage
Industry estimates consistently cite water intrusion as among the most frequent causes of significant RV repair claims, accounting for a substantial share of structural damage.
$3,000–$10,000+
Typical cost to repair delaminated RV sidewalls
Repair estimates from RV service centers vary widely by unit size and severity, but full sidewall delamination frequently runs into the thousands before labor is factored in.
It's also worth understanding what your coverage actually includes. Many owners are surprised to learn that gradual water intrusion—the kind that develops over a season of neglected seals—is often excluded from standard RV insurance policies as a maintenance issue rather than a sudden event. Our article on what RV insurance actually covers explains those gaps in detail.
Delamination Can Render an RV Unrepairable
When water saturates the wood substrate inside an RV wall for an extended period, the bond between the fiberglass skin and the inner framing fails permanently. In advanced cases, the structural integrity of the wall is compromised to the point where repair costs exceed the vehicle's value. Catching moisture intrusion early—at the sealant stage—is the only reliable way to prevent this outcome.
Seasonal preparation also matters. Before winter storage, every penetration point should be inspected and resealed as needed. See our RV winterizing walkthrough for a structured approach to protecting seals before freezing temperatures arrive.
Building a Roof Inspection Habit That Actually Works
Effective RV roof care isn't complicated, but it requires consistency. A twice-yearly inspection—spring before the travel season and fall before storage—is the minimum most RV maintenance guides recommend. Each inspection should cover every penetration point, the condition of the membrane or roofing material itself, and the perimeter edge where the roof meets the sidewalls.
Use a sealant approved for your specific roof type. EPDM rubber roofs (common on Class A and Class C motorhomes), TPO membranes, fiberglass, and aluminum roofs each require compatible products. Using the wrong sealant can cause adhesion failure or material degradation within a single season.
Match Sealant to Your Specific Roof Type
Using a petroleum-based sealant on an EPDM rubber roof can cause the membrane to swell, crack, and lose adhesion rapidly. Always verify the chemical compatibility of any sealant before application. If you're unsure which material your roof uses, consult your owner's manual or have a certified RV technician confirm the roof type before attempting any sealing work.
If you're weighing whether to own an RV at all, ongoing maintenance like this is a real cost of ownership. Our realistic comparison of renting vs. owning an RV factors in these recurring responsibilities alongside the financial picture. For homeowners who also maintain a residential roof, many of the inspection principles parallel those covered in our annual home roof inspection guide.
The content on this site is for informational purposes only and is not a substitute for professional advice. Always consult a qualified professional for guidance specific to your situation.